Hello everybody, I hope you are having an amazing day today. Today, I’m gonna show you how to prepare a distinctive dish, how to make vegan kimchi. One of my favorites. This time, I’m gonna make it a little bit unique. This is gonna smell and look delicious.
How To Make Vegan Kimchi is one of the most well liked of recent trending meals in the world. It is easy, it is quick, it tastes yummy. It is appreciated by millions every day. How To Make Vegan Kimchi is something which I’ve loved my entire life. They are fine and they look fantastic.
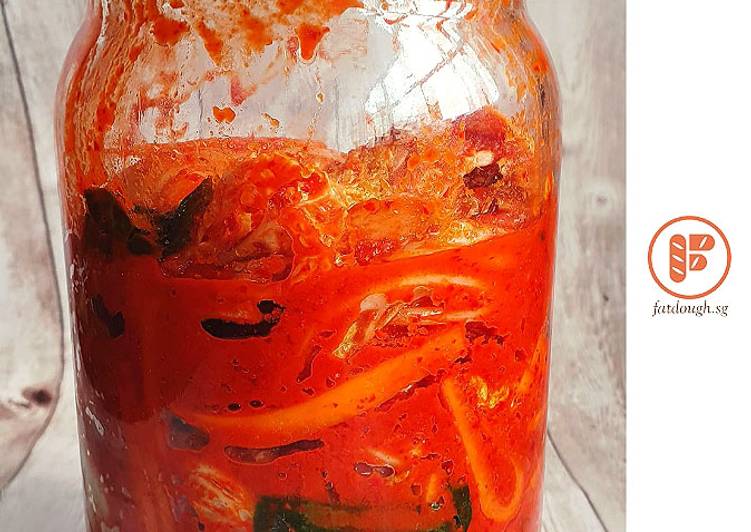
To begin with this recipe, we must first prepare a few components. You can cook how to make vegan kimchi using 12 ingredients and 11 steps. Here is how you cook it.
The ingredients needed to make How To Make Vegan Kimchi:
- Get 1 Nappa Cabbage,
- Prepare Pink Himalayan Salt, For Seasoning
- Get 2 TBSP Vegan-Friendly Soy Sauce / Tamari,
- Get 2 TBSP Demerara Sugar,
- Make ready 1/4 Cup Fresh Pineapple Juice,
- Take 1/4 Cup Warm Water,
- Prepare Ginger Coarsely Sliced, 1"
- Make ready 1 Yellow Onion Coarsely Sliced,
- Get 6 Cloves Garlic Coarsely Minced,
- Prepare Korean Chili Flakes, 1/2 Cup Adjust To Preference
- Take Carrots Julienned, 1 Large
- Prepare Scallions Slice To 2" Long, 2 Bunches
Steps to make How To Make Vegan Kimchi:
- Peel and discard the outer layer of the cabbage. - - Peel and wash each cabbage layer thoroughly. - - Lay layers of cabbage onto a clean plate. - - Sprinkle some salt over the top. - - Place another layer of cabbage over the top.
- Pressing as you stack. - - Repeat the process until all the layers of cabbage are stacked and seasoned. - - Set aside for 30 mins. - - While the cabbage is resting, add soy sauce, sugar, pineapple juice and water into a bowl.
- Stir until well combine or until the sugar has dissolved. - - Add ginger, garlic, onion and chili flakes into a blender. - - Add in the soy sauce mixture as well. - - Blitz until smooth. - - Transfer into a bowl and set aside. - - The cabbage should have rested for 30 mins.
- Before touching the cabbage, make sure your hands are thoroughly cleaned. - - Flip the layers of cabbage onto another clean plate. - - Sprinkle with salt, pressing and stacking. - - Repeat the process with the remaining layers of cabbage. - - Set aside to rest for 30 mins.
- This is the 2nd flip. There will be a total of 4 flips. - - While the cabbage is resting, prepare the carrot and scallions. - - Toss the carrot and scallions with the chili mixture, making sure they are well coated. - - Set aside. - - It should be time for the 3rd flip, season, press and stack. - - Set aside to rest for 30 mins.
- While the cabbage is resting, sterilize the jars and lids in simmering water for 5 mins. - - It should be time for the 4th and last flip, season, press and stack. - - Set aside to rest for 30 mins. - - You can wash the dishes while waiting. - - After 30 mins, wash each layer of cabbage thoroughly under running water to remove excess salt.
- You can pad the cabbage dry with kitchen paper, but I prefer to place them onto plates and allow them to air dry naturally. It will take about 2 hrs, flipping halfway thru. - - Once the cabbage has dried, transfer the carrot and scallions chili mixture into a large mixing bowl. - - Toss in 2 layers of cabbage.
- Coat each layer well with the chili mixture. - - Repeat the process for the remaining layers of cabbage. - - Transfer into the sterilized jars. Press with the back to a spoon to compact the kimchi. - - Sealed and set aside in a cool and dry place for 24 hrs.
- After 24 hrs, remove the lid and using the back of a spoon, press and compact. - - If bubbles start to form, it is a good indication that it is fermenting well and there is still room to press and compact. - - Seal and keep in a cool and dry place.
- Repeat this process every 24 hrs up to a total of 72 hrs or 1 week. - - The longer you allow it to ferment, the tangier and flavorful the tastes will be. - - Once you are satisfied with the taste, chill and keep in the fridge. - - It can be kept for up to 1 to 2 months. - - Be sure to use clean utensils to consume the kimchi.
- Here's the difference between 72 hrs and 7 days aged: - - The 7 days aged kimchi is definitely far superior in terms of flavors and aftertaste. But, it might too overpowering. The 72 hrs aged kimchi does has that tanginess and spiciness. It will be perfect if the kimchi isn't the star of the dish.
So that’s going to wrap this up with this exceptional food how to make vegan kimchi recipe. Thank you very much for reading. I am confident you will make this at home. There is gonna be interesting food at home recipes coming up. Remember to bookmark this page in your browser, and share it to your family, friends and colleague. Thank you for reading. Go on get cooking!