Hello everybody, I hope you’re having an amazing day today. Today, we’re going to make a distinctive dish, kitkat/m&m vanilla birthday cake 6”. One of my favorites. This time, I will make it a little bit unique. This will be really delicious.
Kitkat/M&M Vanilla Birthday Cake 6” is one of the most well liked of current trending foods on earth. It’s enjoyed by millions daily. It is easy, it is fast, it tastes yummy. They’re nice and they look wonderful. Kitkat/M&M Vanilla Birthday Cake 6” is something that I have loved my whole life.
Select country Australia Austria Brazil Bulgaria Canada Colombia Ecuador Egypt, Libya and Sudan France Georgia Germany Greece Indonesia Italy. Have a break, have a KitKat ®. CommunitySee All. Последние твиты от KITKAT (@KITKAT). KITKAT - the perfect treat with your tweet.
To begin with this particular recipe, we have to prepare a few components. You can have kitkat/m&m vanilla birthday cake 6” using 21 ingredients and 9 steps. Here is how you cook it.
The ingredients needed to make Kitkat/M&M Vanilla Birthday Cake 6”:
- Get 200 gr cake flour
- Take 3/4 teaspoon baking powder
- Get 1/4 teaspoon baking soda
- Prepare 1/4 teaspoon salt
- Prepare 115 gr unsalted butter (softened to room temperature)
- Take 175 gr castor sugar (original recipe calls for 200 gr granulated sugar) - i think can lessen the sugar to 150 gr next time
- Take 3 large egg whites, room temperature
- Get 2 teaspoons pure vanilla extract
- Prepare 1/2 cup full fat sour cream/plain greek yogurt (room temperature)
- Prepare 1/2 cup whole milk (room temperature)
- Get Vanilla buttercream (This time I used other recipe)
- Get 230 grams unsalted butter
- Prepare 4-5 cups (480-600 gr) confectioners’ sugar
- Prepare 1/4 cup (60 ml) heavy cream/whole milk
- Get 2 teaspoons pure vanilla extract
- Get to taste Salt
- Take Decoration
- Make ready 18 packages kitkat (each package consist of 2 bars of kitkat). Put the kitkat in the fridge so it hardened and make it easier to break into individual bar. Chocolate won’t melt and become sticky
- Take m&m
- Prepare Colourful rice
- Take Pretty ribbon
ImageFind images and videos about yummy, kitkat Find images and videos about japanese, sweets and kitkat on We Heart It - the app to get lost in what. Ask anything you want to learn about kitkat_m by getting answers on ASKfm. Discover and purchase an extraordinary break, from our classic smooth milk chocolate & crisp wafers, to Japanese KitKat flavours, and even your very own The official KitKat Australia website. Página web oficial de las barritas de chocolate KITKAT de Nestlé, donde podrás tomarte un respiro con el contenido y las promociones de la marca.
Steps to make Kitkat/M&M Vanilla Birthday Cake 6”:
- Preheat oven to 350°F (177°C). Grease three 6×2 inch cake pans, line with parchment paper, then grease the parchment paper. Parchment paper helps the small cakes seamlessly release from the pans.
- Make the cake: Whisk the cake flour, baking powder, baking soda, and salt together. Set aside.
- Using a handheld/stand mixer fitted with a paddle attachment, beat the butter on high speed until smooth and creamy, about 1 minute. Add the sugar and beat on high speed for 2 minutes until creamed together. Scrape down the sides and up the bottom of the bowl with a rubber spatula as needed. Add the egg whites and vanilla extract.
- Beat on medium-high speed until combined, then beat in the sour cream. Scrape down the sides and up the bottom of the bowl as needed. With the mixer on low speed, add the dry ingredients until just incorporated. With the mixer still running on low, slowly pour in the milk until combined. Do not over-mix. You may need to whisk it all by hand to make sure there are no lumps at the bottom of the bowl. The batter will be slightly thick.
- Pour batter evenly into cake pans. Bake for around 18-21 minutes or until the cakes are baked through. To test for doneness, insert a toothpick into the center of the cake. If it comes out clean, it’s done. Allow cakes to cool completely in the pans set on a wire rack. The cakes must be completely cool before frosting and assembling
- Make the frosting: With a handheld or stand mixer fitted with a paddle attachment, beat the butter on medium speed until creamy, about 2 minutes. Add 4 and 1/2 cups confectioners’ sugar, the heavy cream, and vanilla extract.
- Beat on low speed for 30 seconds, then increase to medium-high speed and beat for 2 full minutes. Add up to 1/2 cup more confectioners’ sugar if frosting is too thin or another Tablespoon of cream if frosting is too thick. Add a pinch of salt if frosting is too sweet. (I add 1/8 teaspoon salt.)
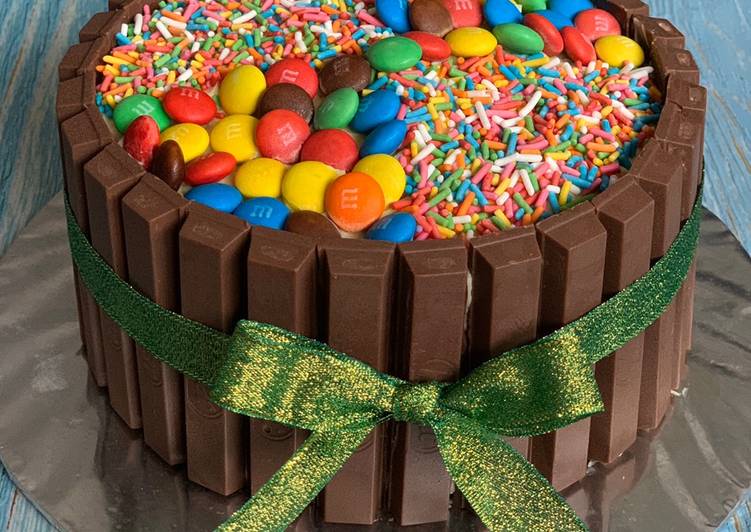
- Decorate the cake: make sure cake is cooled completely before start decorating otherwise buttercream will melt. Spread buttercream in each layer of the cake, on top of the cake and around the cake. Decorate with kitkat, m&m and colourful rice.
- Keep in the fridge for few hours to set the cake and it is ready to be served! Yummy!
Discover and purchase an extraordinary break, from our classic smooth milk chocolate & crisp wafers, to Japanese KitKat flavours, and even your very own The official KitKat Australia website. Página web oficial de las barritas de chocolate KITKAT de Nestlé, donde podrás tomarte un respiro con el contenido y las promociones de la marca. Explore our KITKAT collection from the classics to the Chunky. Enjoy a break time classic today with our chocolate wafer biscuits. Find Kitkat M N M Cake stock images in HD and millions of other royalty-free stock photos, illustrations and vectors in the Shutterstock collection.
So that is going to wrap this up for this exceptional food kitkat/m&m vanilla birthday cake 6” recipe. Thank you very much for your time. I’m confident you will make this at home. There’s gonna be more interesting food in home recipes coming up. Don’t forget to save this page in your browser, and share it to your loved ones, friends and colleague. Thank you for reading. Go on get cooking!